To add a popup to PrestaShop, get one script tag into your storefront's <head>
— via your child theme's head.tpl, a custom-code module, or Google Tag Manager
— and clear the cache. Everything after that happens outside PrestaShop: the design, the
trigger, the pages, the offer.
The part that actually needs care on PrestaShop is not the install. It is the URL targeting, because PrestaShop paths change with your language, your friendly-URL settings and your theme. This guide covers both, plus multistore and the cache traps.
Key Takeaways
- Three install routes — child theme
head.tpl, a custom-code module, or Google Tag Manager. Same one-line tag. - Always use a child theme. Edit the parent and a theme update erases your install.
- Clear the cache under Advanced Parameters → Performance, or the compiled template still has the old head.
- Copy your own URLs before writing targeting rules — PrestaShop paths are localised and configurable.
- Exclude checkout on every marketing campaign. The order-confirmation page is the one exception.
The three ways to install
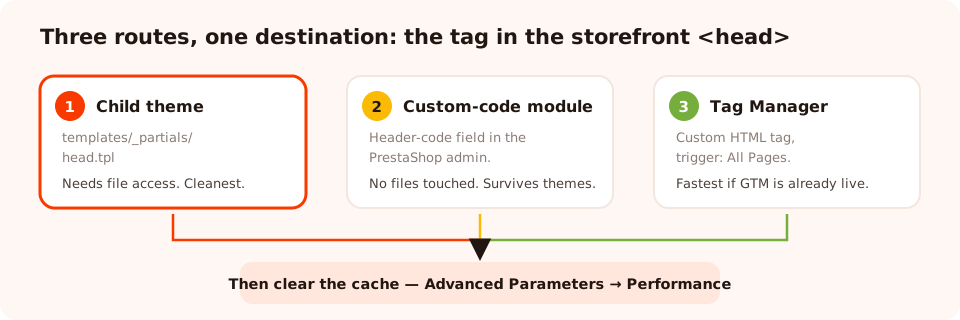
Three routes, one destination: the tag in the storefront <head>. Pick by what access you have.
Route 1 — the child theme's head template
The cleanest option if you have FTP or file-manager access. Open
themes/<your-theme>/templates/_partials/head.tpl in your child
theme and add the tag inside the head block, then clear the cache.
<script id="chillipopup-pixel"
  src="https://player.chillipopup.com/javascript/pixel.js?id=YOUR_WORKSPACE_ID"
  data-api="https://api.chillipopup.com"
  async="true"></script>
Child theme, never the parent. A PrestaShop theme update overwrites parent template files without warning, and the failure mode is silent — your popups just stop appearing one day and nobody connects it to the update.
Route 2 — a custom-code module
If you would rather not touch files, any module that injects code into the storefront header will do. Paste the tag into its header-code field, apply it to all shops if you run multistore, save, and clear the cache. The popup itself needs nothing server-side; the module is purely a delivery mechanism for one line of HTML.
Route 3 — Google Tag Manager
If GTM already runs on the storefront, this is the fastest install and keeps every marketing tag in one place: a Custom HTML tag firing on All Pages. Full walkthrough in the GTM install guide. The only caveat is that a GTM-delivered tag arrives a fraction later than a hard-coded one, which matters for nothing except a zero-second trigger — and you should not be using one of those anyway.
Whichever route you take, verify the same way: load the storefront, view page source, and search for
chillipopup-pixel. Present means the install worked and any remaining problem is a
campaign rule.
Build the popup
With the tag live, the store owner never opens PrestaShop to run a campaign again. Popups are built on a canvas with blocks — text, buttons, input fields, images, shapes, icons, a countdown timer, a coupon-code block, a YouTube embed — and published from the dashboard.
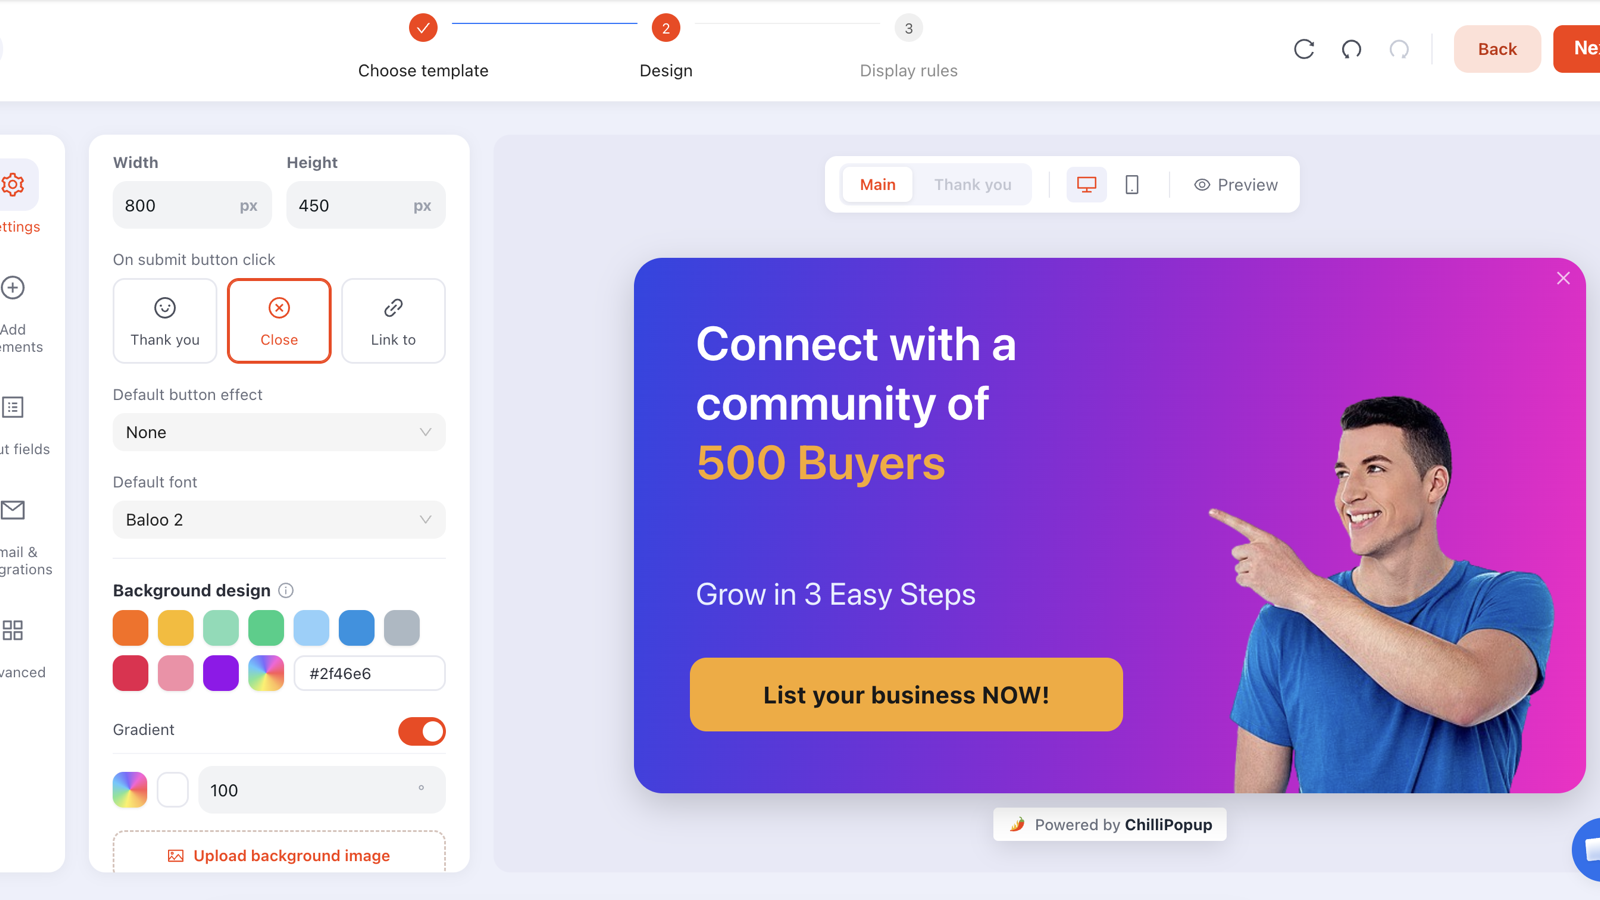
The offer, the copy and the discount code all live outside PrestaShop — so changing them is never a deploy.
Two practical notes for PrestaShop stores. First, match your storefront font: the editor ships a large Google-font catalogue and supports uploading a custom font, so the popup does not read as a bolt-on. Second, if your shop is multilingual, build one campaign per language and target it with a URL rule on the language path — a single popup cannot translate itself.
Test the voucher first. PrestaShop cart rules carry conditions, date ranges, per-customer limits and currency restrictions. Run the code through a real cart before the popup promises it — a rejected code at checkout costs more than the signup was worth.
Targeting PrestaShop URLs
This is where PrestaShop differs from a platform with fixed paths. Friendly URLs, language prefixes and theme routing mean your product and cart paths may not look like anyone else's. So do this first: open each page on your own storefront and copy the path out of the address bar.
Then build rules from what you actually see:
| Target | How to find the pattern | Rule shape |
|---|---|---|
| All product pages | Open two products, compare the paths | URL ends with .html, or contains the shared segment |
| One category | Open the category listing | URL contains the category slug |
| Cart | Add an item, open the cart | URL contains the cart path or controller=cart |
| Checkout | Start a checkout | URL contains the order path — use this as an exclusion |
| Order confirmation | Complete a test order | URL contains order-confirmation |
| One language only | Switch language, watch the prefix | URL starts with /fr/ |
| Homepage only | — | URL is exactly / |
Never let a marketing popup reach checkout. Add URL does not contain your order path to every campaign. The single exception is the order-confirmation page, where the customer has already paid — and that page is one of the best places on the whole shop to ask a question.
Behaviour rules come next: a trigger (exit intent on desktop, scroll or inactivity on mobile), an audience, a frequency so a dismissal is respected, and turning off "show again after conversion". The targeting rules guide has the full set.
Run popups on your PrestaShop store
Build popups, forms, surveys, quizzes and games from one editor — and one script tag. Free plan, no credit card required. Paid plans from $29/month.
Start free →Four campaigns that suit a PrestaShop store
1. First-order voucher for new visitors
Exit intent on desktop, 50% scroll on mobile, category and product pages only, audience new visitors, one email field, code revealed on the thank-you screen. This is the baseline campaign every shop should have running.
2. Free-shipping nudge on the cart
Target the cart path, trigger on exit intent, and lead with the threshold rather than a percentage: "Free delivery over €49." Shipping cost is the most common reason a PrestaShop cart is abandoned, and a discount does not answer it. More in the cart-abandonment guide.
3. A "why didn't you buy?" survey
A one-question survey on exit intent from the cart, with four options: too expensive, shipping cost, just browsing, payment method missing. Four weeks of answers will tell you more about your conversion rate than any heatmap.
4. A restock or seasonal announcement
An announcement bar runs site-wide without covering content — the right shape for delivery cut-off dates, which every shop needs twice a year and which nobody reads when it is buried in the footer.
Common PrestaShop problems
| Symptom | Usual cause | Fix |
|---|---|---|
| Tag not in page source | Smarty cache still serving the old compiled template | Advanced Parameters → Performance → Clear cache |
| Worked, then stopped after an update | The tag was in the parent theme | Reinstall in a child theme, or use a module / GTM |
| Popup on one language only | URL rule includes a language prefix | Drop the prefix, or duplicate the campaign per language |
| Popup shows during payment | No exclusion rule | Add does not contain your order path |
| Rules match nothing | Guessed URLs instead of copying real ones | Copy the path from the address bar of the real page |
| Appeared once, never again | Frequency rule doing its job | Test in a private window |
| Nothing anywhere, tag present | Campaign still a draft | Publish the campaign — drafts never serve |
Add a popup to PrestaShop, step by step
1. Copy the snippet
From the install screen in your dashboard, with the Workspace ID already filled in.
2. Pick your route
Child theme file, custom-code module, or Google Tag Manager — whichever matches your access.
3. Put the tag in the storefront head
Inside the head block of head.tpl, or the module's header-code field.
4. Clear the PrestaShop cache
Advanced Parameters → Performance. Then check View Source for chillipopup-pixel.
5. Build and publish the popup
Design it, set the trigger, publish it. Drafts never serve.
6. Copy your real URLs, then target
Write rules from paths you actually pasted, exclude checkout, and test in a private window.
Related reading
Frequently asked questions
How do I add a popup to PrestaShop?
There are three routes and all of them end with the same script tag in your storefront's <head>: add it to your child theme's head template, inject it with a custom-code module from the admin, or fire it as a Custom HTML tag in Google Tag Manager if you already run GTM. Once the tag is live, every popup you build appears without touching PrestaShop again.
Do I need a PrestaShop module for popups?
Only if you want to avoid touching theme files. The popup itself needs no server-side module — it runs entirely in the browser — so a module here is just a delivery mechanism for one line of HTML. If you already use Google Tag Manager, you do not even need that.
Where is the head template in a PrestaShop theme?
In PrestaShop 1.7 and 8 it is themes/<your-theme>/templates/_partials/head.tpl. Always edit a child theme rather than the parent, or your change disappears the next time the theme is updated. Clear the cache from Advanced Parameters → Performance afterwards.
How do I show a popup only on PrestaShop cart or checkout pages?
Copy the real path from your own storefront — PrestaShop URLs differ by language, friendly-URL settings and theme — then write a URL rule that matches it. Use "contains" against a stable fragment such as the cart controller path, and add a "does not contain" exclusion so marketing popups never appear during payment.
Does this work with PrestaShop multistore?
Yes. If you add the tag in a child theme shared by several shops, or via a module set to all shops, every storefront gets it. To limit popups to one shop in a multistore setup, either install the tag only on that shop's theme or use a URL rule matching that shop's domain path.
Will popups slow down my PrestaShop storefront?
The tag is asynchronous, so it never blocks rendering, and the popup is drawn directly into the page rather than inside an iframe. Because everything runs client-side it is also unaffected by PrestaShop's page cache — you can change an offer without clearing anything.